

When it comes to makeup, blush is one of those magical products that can instantly make you look fresher, healthier, and more awake. But applying blush isn’t just about picking a pretty color and swiping it on your cheeks. The right way to apply blush depends heavily on your face shape.
Understanding where to place your blush according to your face shape can transform your look — giving your features better definition, enhancing your natural bone structure, and even visually balancing proportions. In this guide, we’ll walk you through how to apply blush for every face shape, the best blush types and tools to use, and pro tips for a natural, lifted glow.
Let’s dive into the art of blush application tailored to your face shape.
Why Your Face Shape Matters When Applying Blush
Different face shapes have different dimensions and proportions. The purpose of blush is not just to add color but also to enhance your face’s natural structure. Applying blush in the wrong area can make your face look rounder, wider, longer, or even tired.
By applying blush according to your unique bone structure, you can:
-
Accentuate your cheekbones
-
Slim or elongate certain facial areas
-
Add symmetry to your overall look
-
Create a youthful and radiant glow
How to Determine Your Face Shape
Before jumping into the blush placement, it’s important to determine your face shape. Here are the most common face shapes and how to identify them:
-
Round Face: Equal width and length; soft, curved lines with full cheeks and a rounded jawline.
-
Oval Face: Slightly longer than wide with a curved jawline and high cheekbones.
-
Square Face: Equal width of forehead, cheekbones, and jawline with sharp angles.
-
Heart-Shaped Face: Wider forehead, high cheekbones, and a narrow, pointed chin.
-
Long/Rectangular Face: Face is longer than it is wide with similar width across the forehead, cheeks, and jaw.
-
Diamond Face: Narrow forehead and jawline with wide cheekbones.
Once you’ve identified your face shape, use the customized blush placement techniques below.
Also Check : The Best Lightweight Foundations for a Barely-There Look
How to Apply Blush for Round Faces

Goal: Add dimension and slim the face
-
Where to Apply: Apply blush slightly below the apples of your cheeks and sweep it upwards toward the temples. Avoid putting blush directly on the center of your cheeks as it can make your face appear rounder.
-
Technique: Use an angled brush and blend in an upward motion for a lifting effect.
-
Tip: Choose matte or soft satin blushes to prevent extra shine, which can emphasize fullness.
How to Apply Blush for Oval Faces
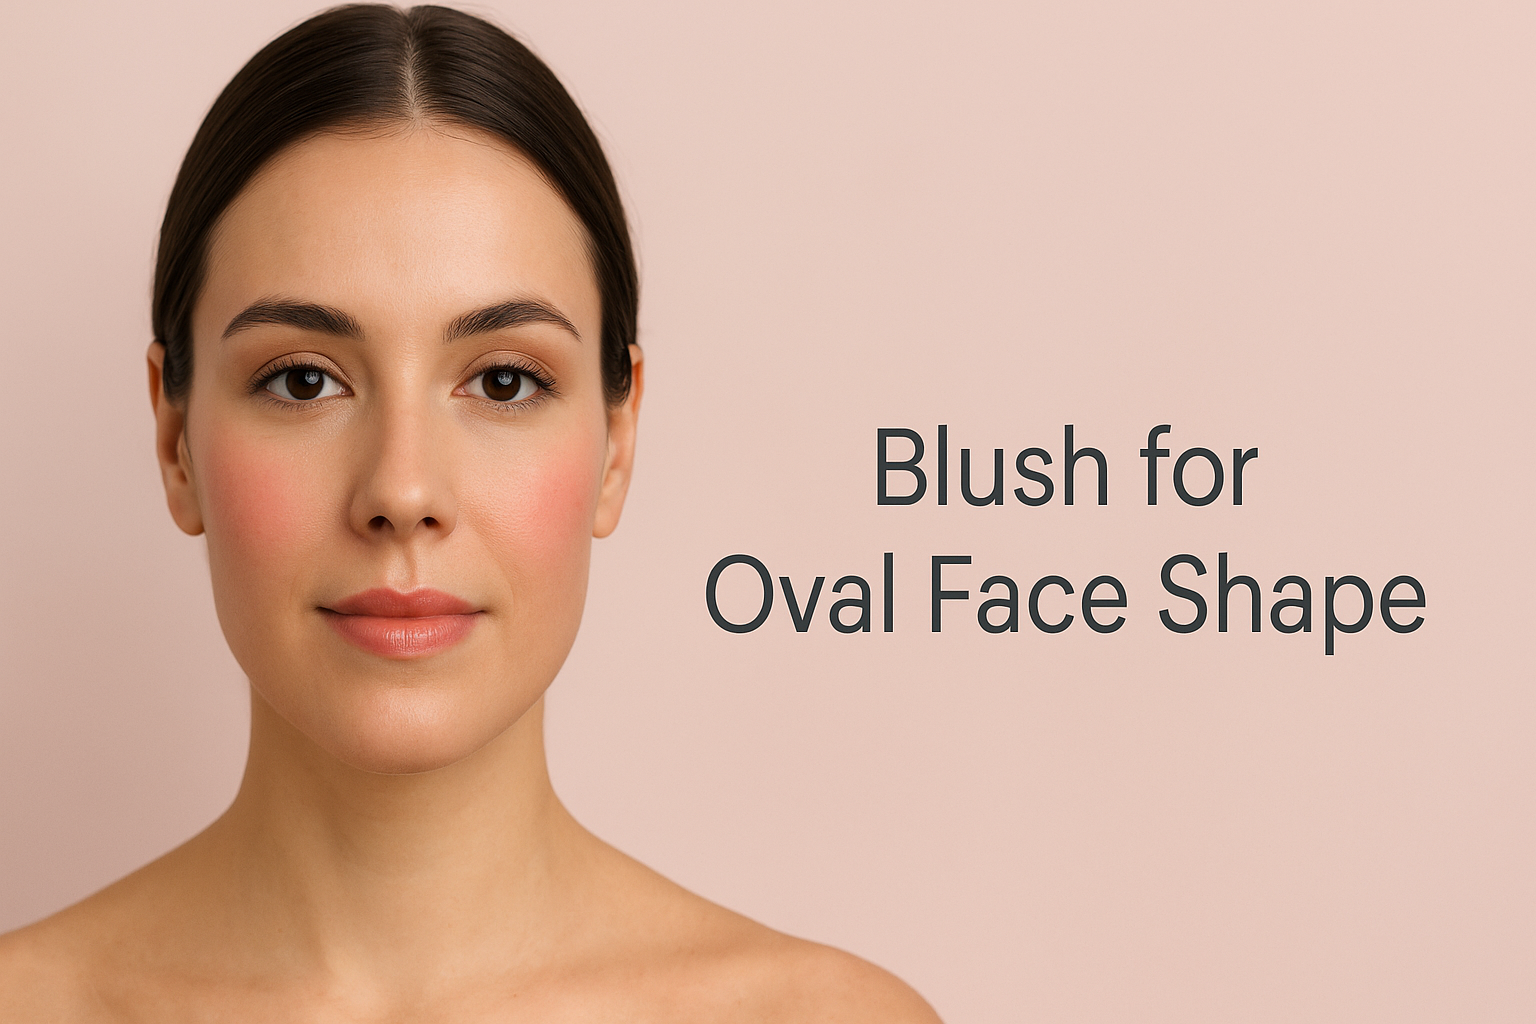
Goal: Enhance natural balance
-
Where to Apply: Lightly apply blush on the apples of your cheeks and blend it slightly upwards toward the temples.
-
Technique: Use a fluffy blush brush for a soft, airbrushed finish.
-
Tip: You have the most balanced face shape, so feel free to experiment with both placement and color!
How to Apply Blush for Square Faces
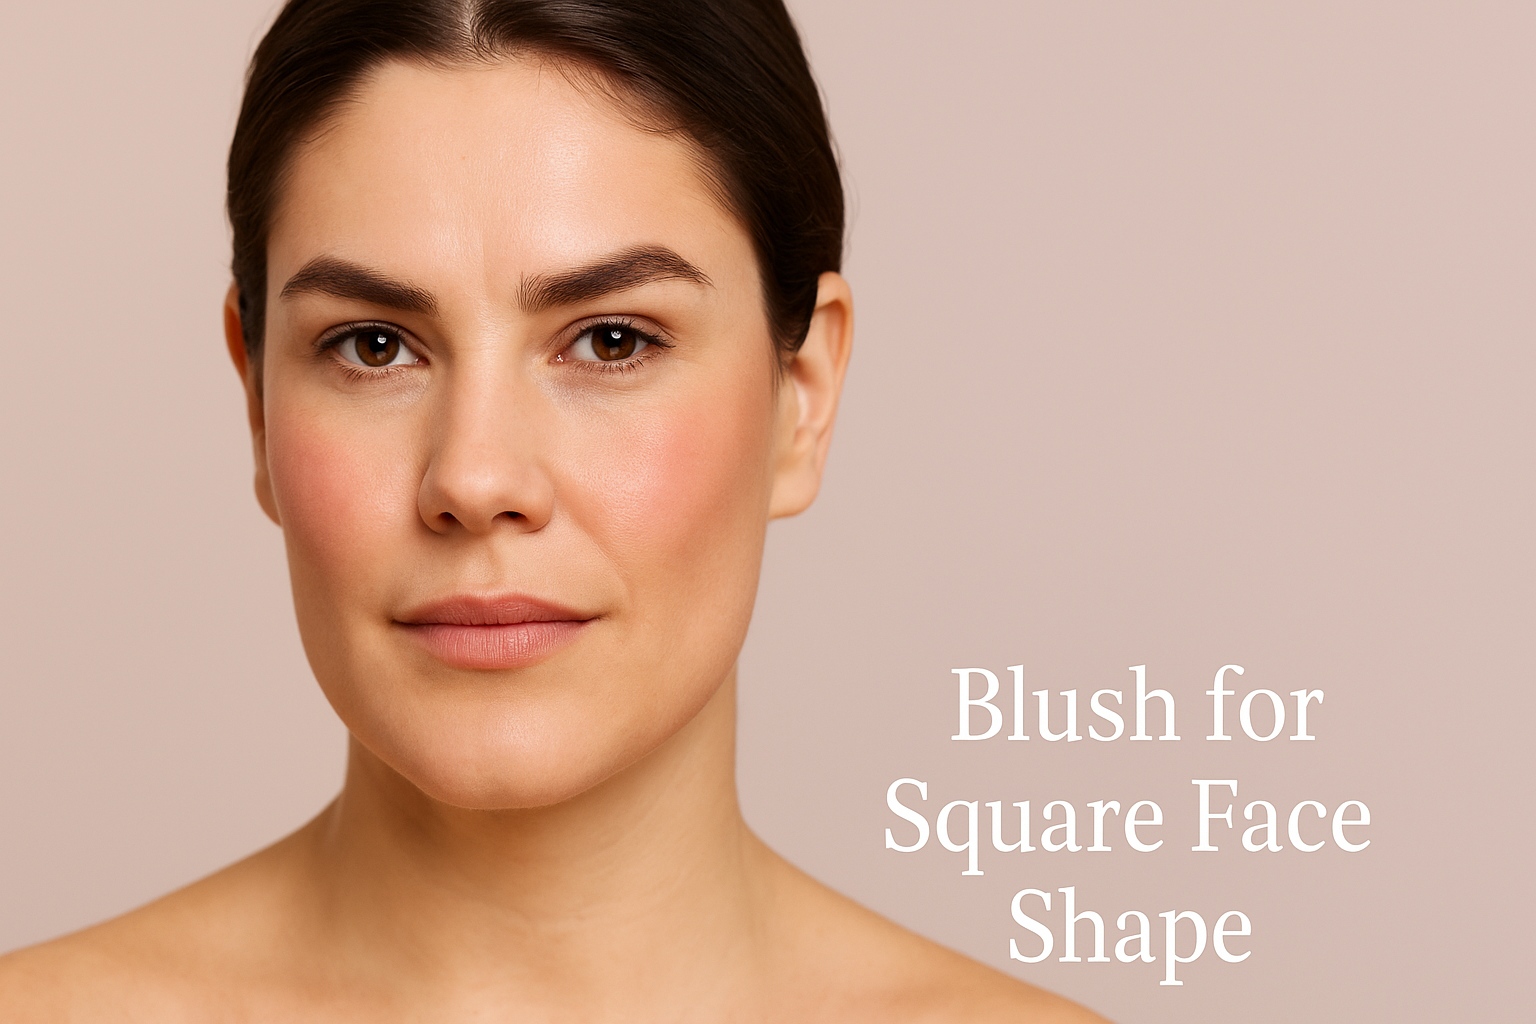
Goal: Soften angular features
-
Where to Apply: Start on the apples of the cheeks and sweep in a soft circular motion toward the temples.
-
Technique: Blend the blush a little higher up and curve it slightly to round out the edges of your face.
-
Tip: Cream blushes work wonderfully here for a dewy, skin-like finish that softens strong jawlines.
How to Apply Blush for Heart-Shaped Faces
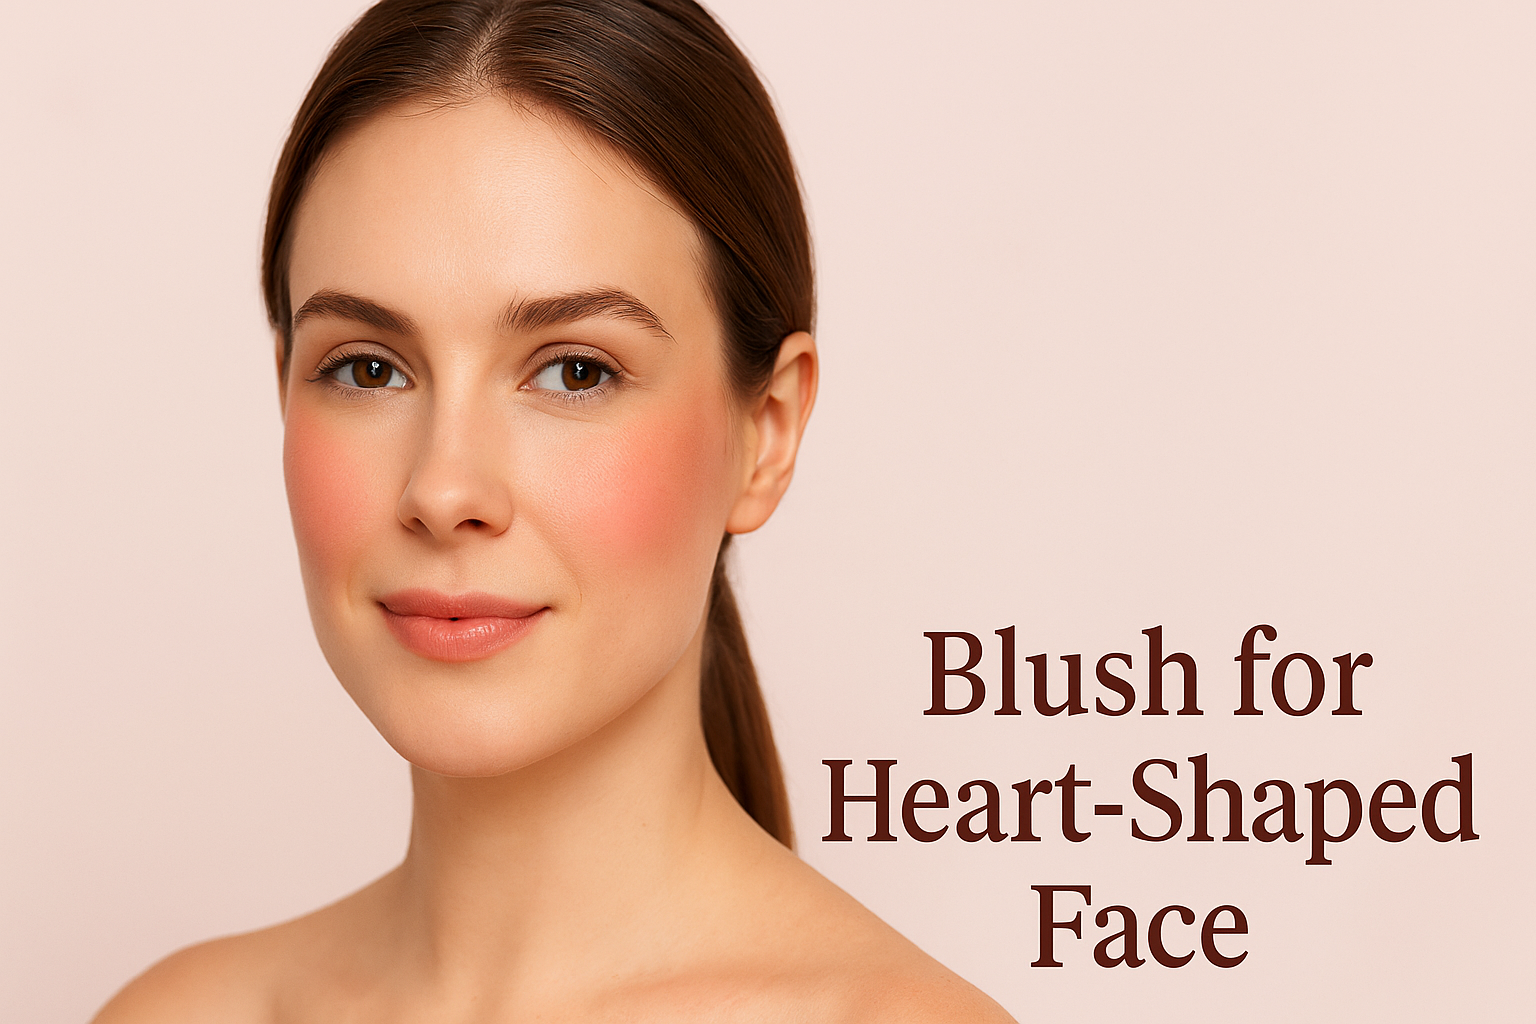
Goal: Balance a wide forehead and narrow chin
-
Where to Apply: Focus on the outer apples of the cheeks and sweep outward toward the ears to widen the lower part of the face.
-
Technique: Use a soft circular motion with a small blush brush.
-
Tip: Avoid applying blush too high on the cheeks; it can over-accentuate the width of your forehead.
How to Apply Blush for Long or Rectangular Faces

Goal: Add width to create balance
-
Where to Apply: Focus blush on the apples of your cheeks and blend it horizontally toward the ears.
-
Technique: Use side-to-side strokes instead of upward strokes to visually shorten the face.
-
Tip: A bit of blush on the bridge of your nose can also create the illusion of a fuller, more youthful face.
How to Apply Blush for Diamond Faces
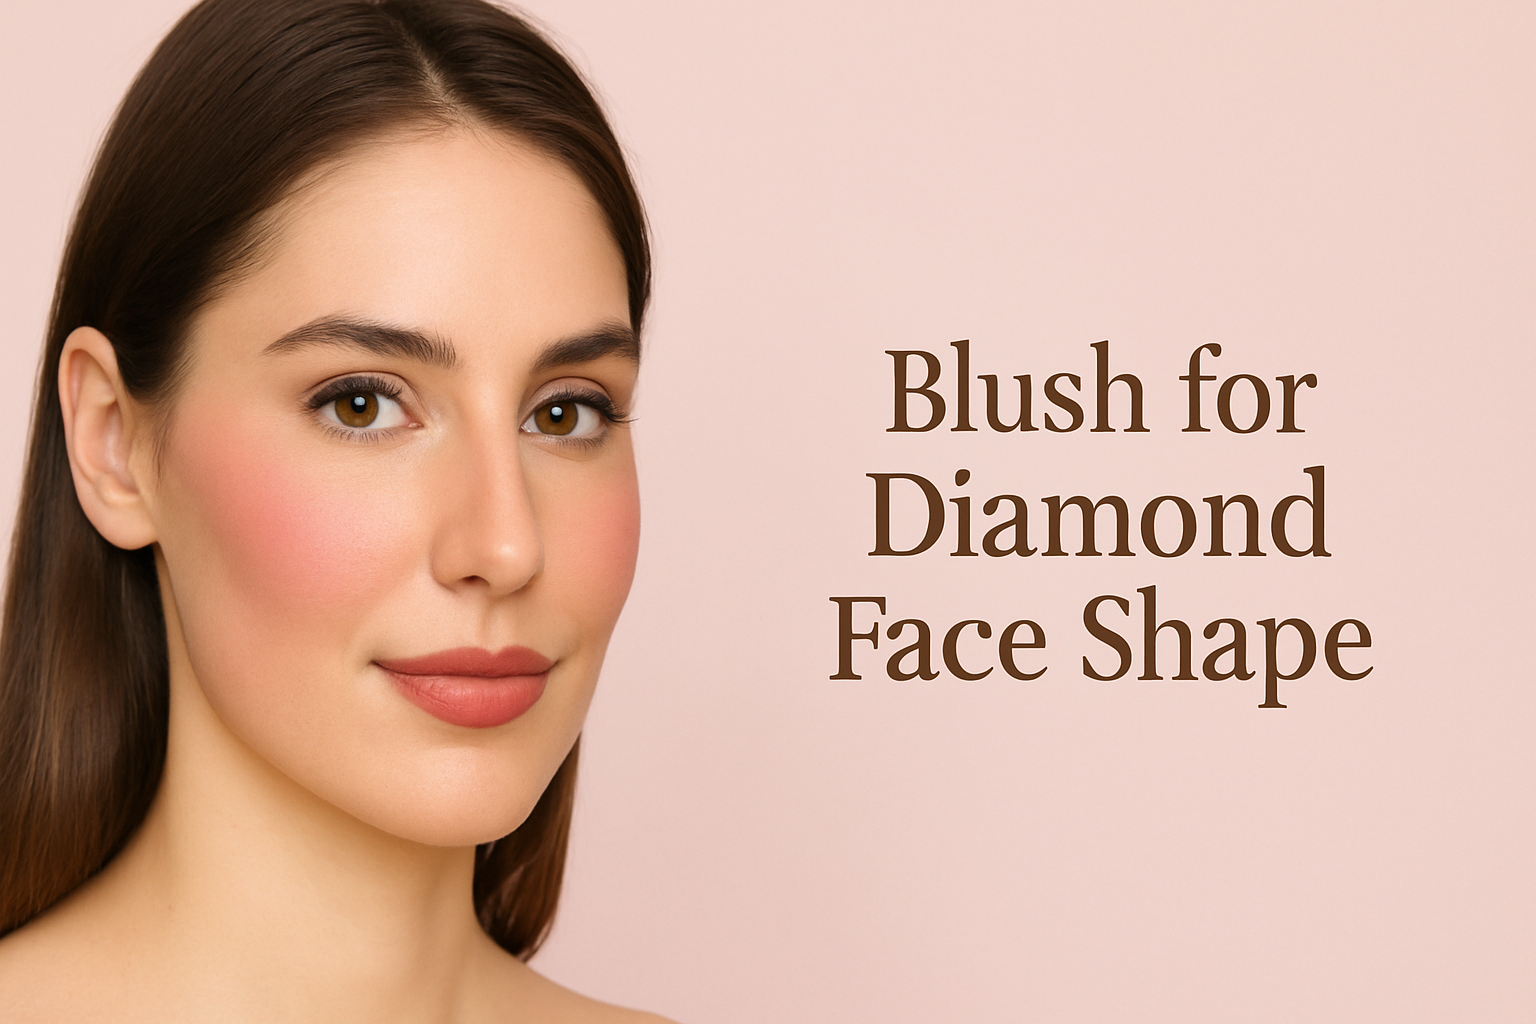
Goal: Soften wide cheekbones
-
Where to Apply: Apply blush on the upper part of your cheeks and blend slightly toward your temples.
-
Technique: Keep the application higher on the face to complement the angular structure.
-
Tip: A touch of highlighter above the blush will give your cheekbones a natural pop.
Blush Formula Guide: Which One Is Right for You?
Choosing the right formula is just as important as placement. Here are the most common types of blush and who they’re best for:
-
-
Great for oily or combination skin
-
Easy to blend and build up
-
Long-lasting
-
-
-
Ideal for dry or mature skin
-
Provides a dewy, natural look
-
Best applied with fingers or a stippling brush
-
-
-
Super pigmented; a little goes a long way
-
Great for all skin types depending on formulation
-
Works well under foundation for a “lit from within” glow
-
Tools You’ll Need for Flawless Blush Application
-
Angled Brush: Perfect for precise cheekbone application
-
Stippling Brush: Ideal for cream or liquid blushes
-
Blender Sponge: Helps diffuse product for a natural look
-
Fan Brush: Great for lightweight powder application
Pro Tips for Blush That Looks Natural and Lasts All Day
-
Apply Blush After Foundation & Before Setting Powder: This helps it blend better with your base.
-
Blend, Blend, Blend: Harsh lines can make blush look dated. Always blend edges.
-
Start Light and Build Up: It’s easier to add more color than take it away.
-
Use the Right Shade:
-
Fair Skin: Soft pinks, peaches
-
Medium Skin: Roses, mauves
-
Deep Skin: Berries, rich oranges, reds
-
-
Consider Lighting: Always check your blush in natural light before heading out.
-
Blush as Eyeshadow: For a monochromatic look, try using the same blush on your eyes.
Final Thoughts
Blush is more than just a splash of color—it’s a powerful sculpting tool that, when used correctly, can completely enhance your facial features. By tailoring your blush placement to your unique face shape, you’ll not only look better in photos but also feel more confident in your makeup routine.
Whether you’re rocking a soft rosy flush or a bold berry glow, applying blush the right way can elevate your entire look. Try these techniques out, experiment with formulas, and most importantly—have fun with it!