
Are you looking for a quick and effortless way to make your eyes pop without going over the top? The soft eyes look is your go-to beauty trick for adding subtle charm to your everyday makeup routine. Whether you’re heading to the office, running errands, or going out for a casual brunch, this simple 3-step soft eye tutorial will enhance your natural beauty without overwhelming your features.
In this guide, we’ll break down exactly how to achieve soft eyes in 3 easy steps, using minimal products while still getting maximum impact. Plus, we’ve included SEO-rich tips, pro techniques, and product suggestions that make this your one-stop resource for mastering the everyday soft eyes look.
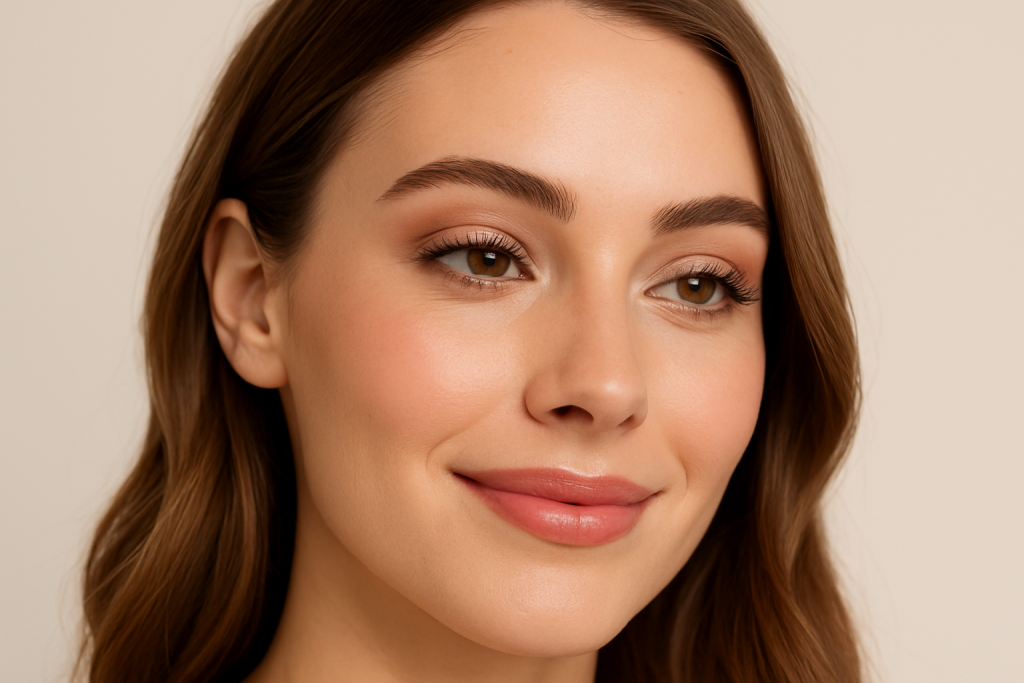
What Are “Soft Eyes”?
Before diving into the steps, let’s clarify what we mean by “soft eyes.” A soft eye makeup look is characterized by neutral or pastel tones, light blending, minimal eyeliner, and natural lashes. It’s perfect for:
-
Everyday wear
-
Work or school looks
-
Minimalist beauty fans
-
Beginners in makeup
Think creamy beige lids, peachy tones, soft brown shadows, and wispy lashes. It’s versatile, flattering for all eye shapes, and especially great for mature or hooded eyes where heavy makeup can appear too harsh.
Why Choose a Soft Eye Look?
-
It enhances your natural beauty rather than masking it.
-
Quick and easy – perfect for busy mornings.
-
Low-maintenance – fewer products, less mess.
-
Adaptable – suits every skin tone and eye color.
-
Camera-friendly – looks fresh and glowy in natural lighting.
Now, let’s jump into the tutorial!
Step 1: Prime and Perfect Your Base
The first step in achieving soft eyes is prepping your eyelids properly. A smooth, even base ensures that your shadow blends seamlessly and stays put throughout the day.
🔹 Clean & Moisturize
Always start with clean skin. Use a gentle micellar water or your favorite cleanser to remove any oil or leftover makeup. Follow up with an eye cream to hydrate the delicate area around your eyes.
🔹 Apply an Eye Primer or Concealer
Use an eyeshadow primer to prevent creasing and help colors appear more vibrant. If you don’t have a primer, a small dab of concealer can also do the trick.
Pro Tip: Use a damp sponge or your finger to lightly pat the product until it disappears into the skin. Don’t forget to set it with a translucent powder if you’re using concealer, so your eyeshadow doesn’t crease.
🔹 Neutral Base Shadow (Optional)
Apply a nude or bone-colored matte eyeshadow that matches your skin tone. This step isn’t mandatory, but it makes blending easier and ensures a more professional finish.
Step 2: Add Soft Dimension with Neutral Shadows
This is where the magic happens. You’ll build soft dimension using a few neutral or muted tones.
🔹 Choose the Right Shades
For a universally flattering soft look, stick to:
-
Soft browns
-
Peachy pinks
-
Champagne shimmer
-
Taupes or mauves
For fair skin: Try light peach, beige, or rose.
For medium skin: Warm browns, copper, or golden beige.
For deep skin: Rich chocolate, bronze, or terracotta.
🔹 Define the Crease
Using a fluffy blending brush, apply a light brown or taupe shade into your crease using windshield wiper motions. This creates depth without making the eyes look heavy.
-
Start light and build slowly.
-
Use soft pressure.
-
Blend slightly above the crease if you have hooded eyes.
🔹 Add a Soft Lid Color
Choose a soft shimmer or satin finish for the eyelid – like champagne, peach, or rose gold. Use your finger or a flat brush to gently press it onto the lid.
-
Keep it light and airy.
-
Focus on the center of the lid for a subtle glow.
🔹 Brighten the Inner Corner (Optional)
To make your eyes appear bigger and more awake, apply a tiny amount of highlighter or pale shimmer to the inner corners of your eyes.
Pro Tip: Avoid chunky glitter – soft eyes are about smooth, diffused glow.
Step 3: Define with Soft Liner and Natural Lashes
Here’s where we wrap up the look with minimal liner and mascara to add subtle definition without the drama.
🔹 Skip Harsh Liquid Liners
Instead of black liquid eyeliner, opt for:
-
Brown pencil liner
-
Soft gel liner
-
Dark brown eyeshadow as liner
Lightly smudge the liner along your upper lash line, keeping it close to the lashes. Focus just on the outer third of the eye for a gentle lift.
Optional: Use a pencil in your waterline for added definition, or skip it entirely for a fresh, open-eyed look.
🔹 Curl and Coat Your Lashes
Curl your lashes to open up the eyes. Then apply one to two coats of a natural-looking mascara.
-
For soft eyes, avoid thick, clumpy mascara formulas.
-
Choose a lengthening or defining mascara instead.
Pro Tip: Wiggle the mascara wand from the base to the tips and avoid over-layering to keep the lashes light and fluttery.
🔹 Brows: Keep Them Natural
Don’t forget your brows! Groom them lightly with a brow pencil or tinted brow gel.
-
Avoid heavy filling.
-
Use short strokes for a feathered look.
Optional Add-On: Soft Lower Lash Definition
Want a little more polish? Smudge a soft matte brown or mauve shadow along the lower lash line with a small pencil brush.
-
Use light pressure and blend well.
-
This gives a naturally contoured, bigger-eye effect.
Everyday Soft Eyes: Final Look Summary
Your final result should feel:
-
Effortlessly pretty
-
Fresh and natural
-
Lightly defined
-
Comfortable for all-day wear
It’s the kind of look that brings compliments without anyone noticing exactly what you did differently!
Recommended Products for the Soft Eyes Look
Here are some beginner-friendly, affordable, and effective options to try:
| Product Type | Recommended Options |
|---|---|
| Primer | e.l.f. Putty Eye Primer, Milani Eyeshadow Primer |
| Base Shadows | MAC Soft Brown, NYX Nude Matte Shadow in “Blame It on Midnight” |
| Lid Shimmer | Maybelline Color Tattoo in “Barely Branded” |
| Liner | NYX Slide On Pencil in Brown Perfection, Bobbi Brown Gel Liner |
| Mascara | Maybelline Lash Sensational, Essence Lash Princess |
| Brushes | Real Techniques Eye Set, Morphe Eye Obsessed Brush Set |
Final Thoughts
Mastering the soft eyes look in 3 simple steps is a must-have skill for anyone who loves minimal, wearable beauty. With the right technique and tools, you can achieve a polished and pretty eye look that complements every outfit, mood, and schedule.
Whether you’re a makeup beginner or a seasoned pro looking for an everyday go-to, this gentle, glowing eye routine is sure to become a staple in your beauty arsenal.
💡 What’s Next?
Want more tutorials like this? Check out: