
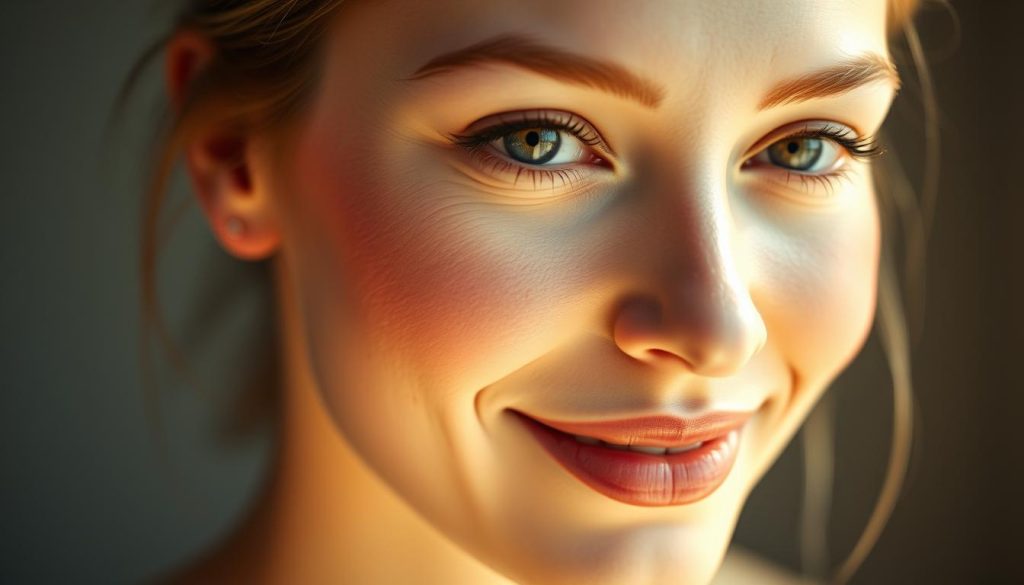
Imagine waking up with cheeks that are naturally flushed. This soft pink glow shows you’re rested and ready for the day. It’s not just a trend; it’s a timeless way to look radiant.
Whether you want a natural look or a bit of color for an event, the right tools and products can help. This guide will show you how to get that soft rosy cheeks look with ease.
Key Takeaways
- Use beetroot, grape juice, or rose petals to create a natural rosy tint.
- Choose brushes like the BS-MALL 18 Pcs set or LAURA GELLER’s angled brush for precise application.
- Pair L’Oréal Paris products with liquid or cream formulas for a dewy finish.
- Blend blush gently and hydrate skin daily to maintain a healthy glow.
- Incorporate vitamins E and C into your diet to support skin health.
The soft rosy cheeks look is more than makeup. It’s about bringing out your natural beauty. From DIY methods to top products like e.l.f. Camo Liquid Blush, we’ll cover it all. Let’s see how a few simple steps can make your makeup routine shine.
Understanding the Appeal of Rosy Cheeks in Modern Makeup
Rosy cheeks have always been popular, from ancient times to today. They make you look vibrant and alive. Blush is a must-have for every skin tone.
The Psychology Behind Rosy Cheeks and Perceived Health
Flushed cheeks are seen as a sign of health and energy. This connection is rooted in biology. During the pandemic, blush became a way to brighten faces under masks.
Korean beauty routines show how blush can make you look healthy. Stars like Jeon Somi use soft pinks and oranges. Blush for all skin tones works because it adds warmth, making all complexions look unified.
How Rosy Cheeks Enhance Different Face Shapes
Blush isn’t one-size-fits-all. Here’s how to customize your look:
- Round faces: Sweep upward along cheekbones to add definition.
- Square/rectangular faces: Soften angles with diagonal strokes from cheekbone to temple.
- Heart-shaped faces: Concentrate pigment on cheek apples to balance broad foreheads.
- Oval faces: Blend outward for a sun-kissed effect that suits most skin tones.
Cultural Significance of the Flushed Cheek Look
Beetroot juice was an early blush, showing our eternal quest for radiance. Today, rosy cheeks tutorial videos celebrate this trend, blending global influences. Korean trends favor dewy, natural hues like peach and coral.
Modern makeup skips heavy contouring. Whether using beetroot-inspired hues or modern formulas, the goal is the same: to show inner vitality through color.
Essential Tools for Creating the Perfect Flush
Getting good at cheek color starts with the right tools. Whether you’re using cream, powder, or liquid, the right brush makes a big difference. It ensures your blush looks natural and even.
Brushes for Flawless Application
Ultra-soft bristles and angled shapes are key. The jane iredale Blending/Contour Brush blends color smoothly. The Sigma Beauty F10 Powder/Blush Brush has soft bristles for even application.
Look for brushes with dense tips for precision and fluffy ones for blending.
BS-MALL 18 Pcs Makeup Brush Set: A Complete Solution
This set has angled, fan, and domed brushes for all techniques. The angled brush is great for precise placement. The fluffy brush gives a natural look.
It’s perfect for trying out different cheek color techniques without buying a lot.
LAURA GELLER NEW YORK Angled Blush Brush: Precision Application
Its angled shape fits the cheekbone perfectly. Synthetic bristles prevent shedding and hold product well. It’s perfect for contouring or defining the cheeks.
e.l.f. Angled Blush Brush: Affordable Excellence
This brush is affordable but rivals more expensive ones. Its bristles grab and distribute blush smoothly. It’s great for beginners or those on a budget.
| Brush | Bristle Type | Best For | Price Range |
|---|---|---|---|
| BS-MALL 18 Pcs Set | Hybrid synthetic/natural | Versatile techniques | $20–$30 |
| LAaura Geller Angled Brush | Premium synthetic | Precision placement | $30–$40 |
| e.l.f. Angled Brush | Synthetic | Beginners & budget users | $5–$10 |
Use the “dab-and-drag method” for sheer coverage or circular motions for blending. Try different tools to find your favorite for natural blush.
Choosing the Right Blush Formula for Your Skin Type
Mastering blush makeup techniques begins with finding the right formula for your skin. The perfect product keeps your cheeks looking fresh and natural. Let’s find the best match for your skin.
If you have oily skin, choose powder blushes with matte finishes. They help prevent greasiness. The Major Headlines Double-Take Crème & Powder Blush Duo is great because it offers both cream and powder options. This way, you can get a dewy base and a matte finish.
For dry skin, cream or liquid blushes are best. Try the e.l.f. Camo Liquid Blush or KIMUSE Soft Cream Blush. They blend into your skin, adding moisture without highlighting dry areas.
If you have combination skin, use liquid blush on the apples of your cheeks and powder on your temples. For mature skin, look for lightweight, buildable formulas with hyaluronic acid. They help smooth out your skin without settling into lines.
- Key ingredients to look for: Hyaluronic acid hydrates, mica adds subtle shimmer, and vitamins E soothe.
- Color tips: Cool undertones look great with berry or rose shades. Warm tones shine with peaches or apricots. Neutrals are perfect for soft pinks.
When using these makeup for glowing cheeks products, blend gently to avoid harsh lines. Let your formula enhance your natural skin texture.
Also Check :
| The Best “No-Makeup” Makeup Products Under $20 |
| Achieve a Stunning Gothic Party Makeup Look |
Mastering the Soft Rosy Cheeks Look: Step-by-Step Tutorial
Ready to perfect your rosy cheeks tutorial? Follow these blush makeup techniques to craft a natural flush. This look enhances your complexion without looking artificial. Each step is designed for effortless application and long-lasting results.

Prepping Your Skin for Blush Application
Start with clean, hydrated skin. Moisturize first, then apply a lightweight primer. This creates a smooth canvas for your blush.
Avoid heavy foundation layers. Let your skin’s natural texture show through.
Finding Your Natural Flush Points
- Smile to locate your natural apple areas—this highlights where blood flows naturally.
- Round faces: Apply blush slightly above the apples and sweep upward to elongate the face.
- Square faces: Blend diagonally from the temples to soften angles.
- Heart-shaped faces: Focus on cheekbones to balance features.
Building Color Gradually for Natural Results
Use a light hand—start with a tiny amount of product. Dip your brush into blush, tap off excess, then apply to the center of your cheek. Blend outward with circular motions.
Repeat layers sparingly until you reach your desired intensity. For a muted effect, gently layer a sheer foundation over the area and blend outward.
Blending Techniques for Seamless Transitions
Use a fluffy brush (like the e.l.f. Angled Blush Brush) to diffuse edges. For liquid formulas, dab Lisa Eldridge’s Liquid Lurex Blush onto skin and blend with fingertips.
Feather edges toward the temples using light, upward strokes. Avoid harsh lines—aim for a gradient that fades into your skin tone.
Liquid Blush Techniques for Dewy, Natural-Looking Cheeks
Liquid blushes change your makeup game, giving you a natural blush application that looks like a healthy glow. Start with the e.l.f. Camo Liquid Blush for a smooth finish. Here’s how to nail this trend:
Spotlight on e.l.f. Camo Liquid Blush: Application Tips
Start with a dab of product—less is better. Use a damp brush or your fingertips to spread it out. For a soft rosy cheeks look, put it on after foundation to avoid smudging. Blend it up toward your hairline for a bright look.
| Skin Tone | Best Shades |
|---|---|
| Fair | Soft pinks, light peaches |
| Medium | Rosy pinks, warm corals |
| Olive | Oranges, golden tones |
| Dark | Deep berries, brick red |
Layering Strategies for Long-Lasting Results
- Apply a thin first layer with a damp sponge.
- Let it dry before adding a second layer for more color.
- Seal with a setting spray instead of powder to keep it dewy.
Pro tip: Carry a small spritz of setting spray to refresh your look midday without streaking.
Cream Blush Application for a Soft, Glowing Finish
Cream blush changes your natural blush application game. It gives you a dewy, natural-looking flush. The KIMUSE Soft Cream Blush is known for its soft texture and blendability. It adds a radiant glow to your cheeks without looking fake.

Mastering KIMUSE Soft Cream Blush
Start with a small amount of KIMUSE on your cheek apples. Warm it up with your fingers for a natural glow. For a soft look, blend it outwards in circles. This cheek color technique suits all skin tones, with warm pinks or peaches for a healthy glow. Tip: Apply it lightly under powder foundation for a natural finish.
Fingertip vs. Brush: Choose Your Tool
- Fingers: Perfect for natural blush application. Your body heat makes it blend seamlessly. Ideal for beginners and soft results.
- Domed Brushes: Great for precision and sharp edges. Use them to define cheekbones without touching your skin.
Use a damp StansOut Beauty Sponge for an airbrushed look, best on dry skin.
Lock It In: Long-Lasting Cream Blush Tips
For oily skin, start with a mattifying primer. Then, apply KIMUSE and set with translucent powder. Finish with a setting spray to stop creasing. To keep it from fading, layer a light powder blush over it. This keeps it looking fresh without drying your skin. Reapply with a sponge in the afternoon for a new glow.
Customizing Your Rosy Cheeks for Different Occasions and Seasons
Adjusting your blush application keeps your makeup fresh for any event or weather. Think about the season first. Summer is perfect for light formulas like the Haus Labs by Lady Gaga Color Fuse Glassy Blush Balm. It gives a dewy look that’s great for hot days.
In winter, choose deeper shades like berry or apricot. They help counteract pale skin. This way, you avoid looking washed out.
- Everyday Looks: Use sheer formulas like Basma The Cream Blush for a natural flush. Dab lightly with fingers for a subtle, no-makeup glow.
- Special Events: Go bold with sunset-inspired shades or the glazed technique—mixing blush with highlighter—for a radiant, camera-ready finish.
- Cold Weather: Warm, matte powders add dimension without highlighting dryness. Try contouring with a deep blush shade to define cheekbones.
Color choice is key. Pale skin looks great with soft pinks. Deeper tones shine with bronze or terracotta. Try the undereye blush trick for a fresh look in spring or fall.
For video calls or dim lighting, choose matte or satin finishes. This avoids shine overload.
Remember, makeup for glowing cheeks isn’t one-size-fits-all. Swap formulas between seasons. Cream blushes in dry winter air and lightweight gels in summer.
Match your blush with your outfit’s palette. Cool pinks for winter whites, coral with spring florals. Let the occasion guide your intensity. This keeps your look polished and purposeful.
Conclusion: Embracing Your Natural Glow with Confidence
Learning to get the soft rosy cheeks look is easy with the right tools and tips from this tutorial. You can use liquid, cream, or powder formulas. Products like the e.l.f. Camo Liquid Blush or KIMUSE Soft Cream Blush give you buildable coverage and last all day.
Blush has been a beauty favorite for ages. Now, modern blushes mix 88% skincare ingredients to moisturize your skin while adding color.
Try using brushes like the BS-MALL 18 Pcs set or LAURA GELLER’s angled brush to get it just right. The idea is to highlight your natural beauty, not hide it. Start with a light base, blend upwards from the apples of your cheeks, and adjust the color to match your skin.
With a bit of practice, achieving this look becomes second nature. It shows off your health and energy. Make these techniques a part of your daily routine. Let your natural glow shine and show off your confidence.